Repricing rules are created and edited in a 5-step wizard. Open it with Add New Rule on the Repricing Rules page, or Edit on an existing rule, and move through with Next. Many fields stay folded or switched off until you turn them on — open them to see their options.
Step 1 — General Settings
Name the rule and choose how it runs.
- Rule Name — so you can recognise it in the list.
- Method — Manual (Pricefy suggests a price you apply with one click) or Automatic (Pricefy updates the price for you on a schedule).
Choosing Automatic unfolds Automatic Repricing Settings: pick Every day at a set time (Every 24h and Every 1h are coming soon). Automatic repricing needs a Business plan.
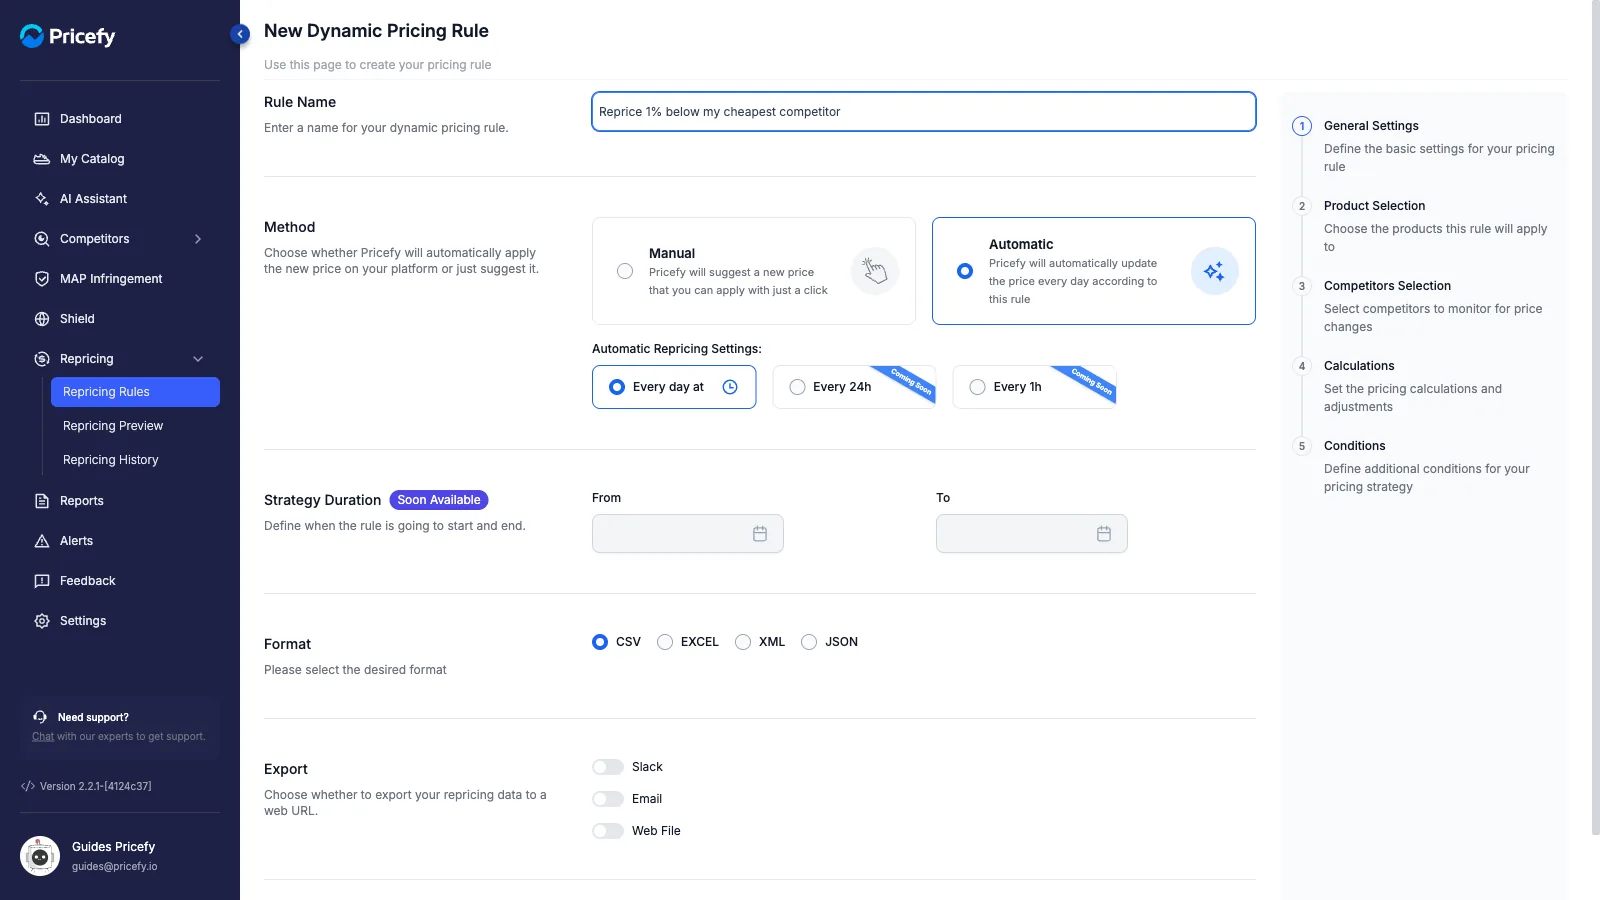
Then choose the output:
- Format — the results-file format: CSV, EXCEL, XML or JSON.
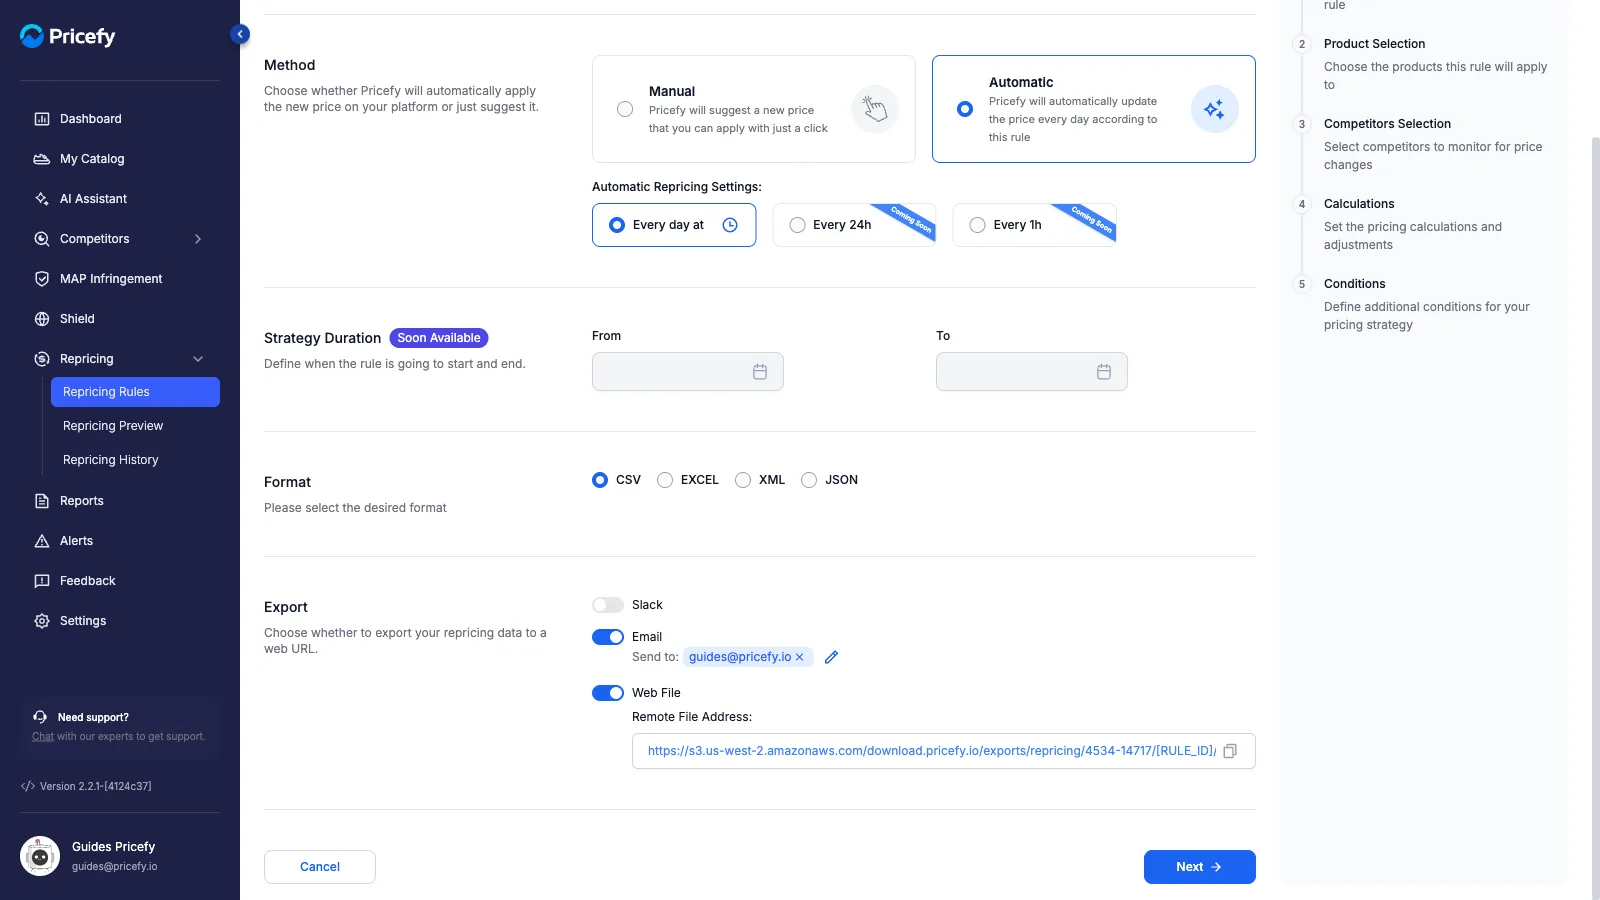
- Export — switch on a channel to reveal its settings:
- Email — a Send to list; add the recipient addresses.
- Web File — a Remote File Address, a feed URL (in your chosen format) you can pull the results from.
- Slack — coming soon (currently disabled).
Export needs a Pro plan or higher.
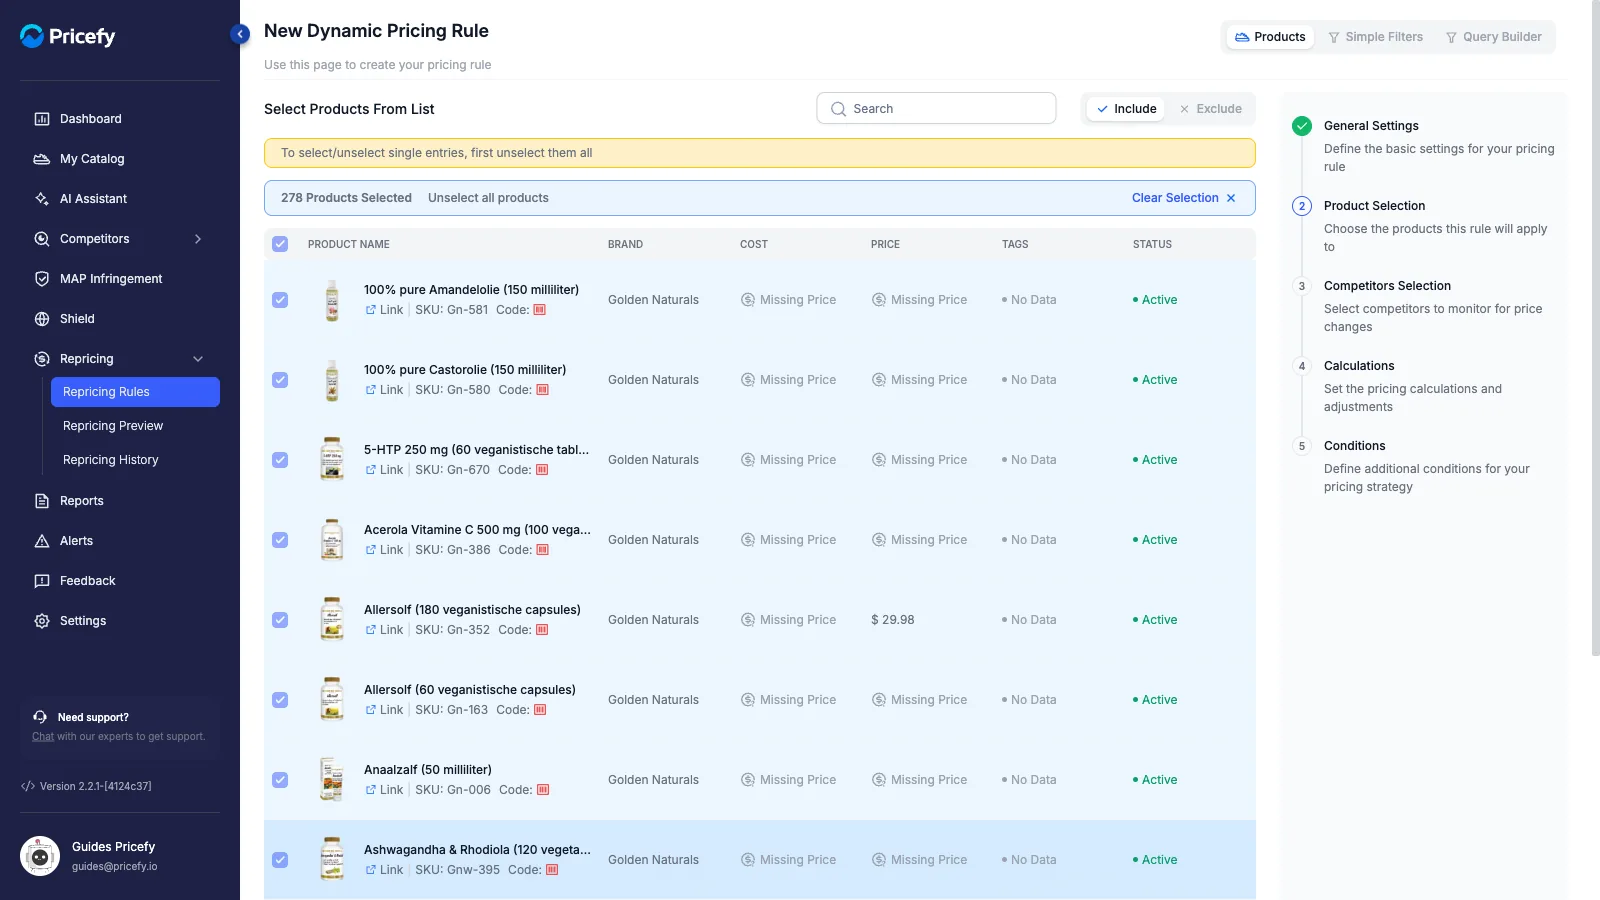
Step 2 — Product Selection
Choose which products the rule applies to. An Include / Exclude switch flips what the selection means, and Preview Products lists what currently matches. Leave the selection empty to apply the rule to all products.
There are three ways to pick, switched at the top. Products lists your catalog so you can tick items by hand:
Simple Filters builds a saved filter set instead — for example by brand, tag or status:
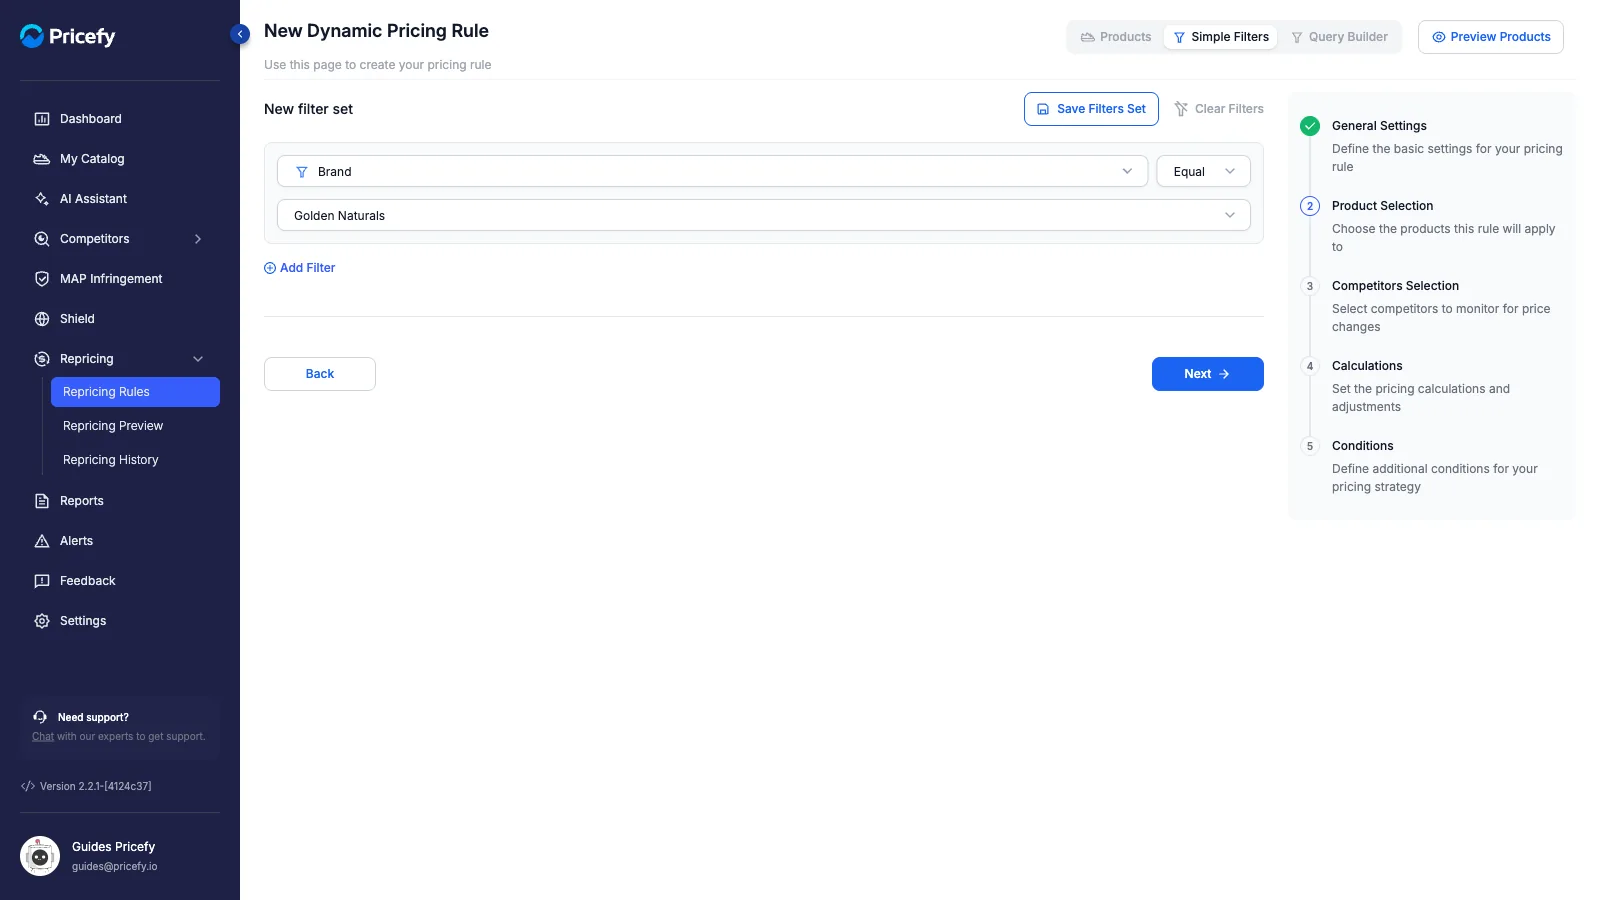
Query Builder is the advanced option, combining conditions with and/or logic:
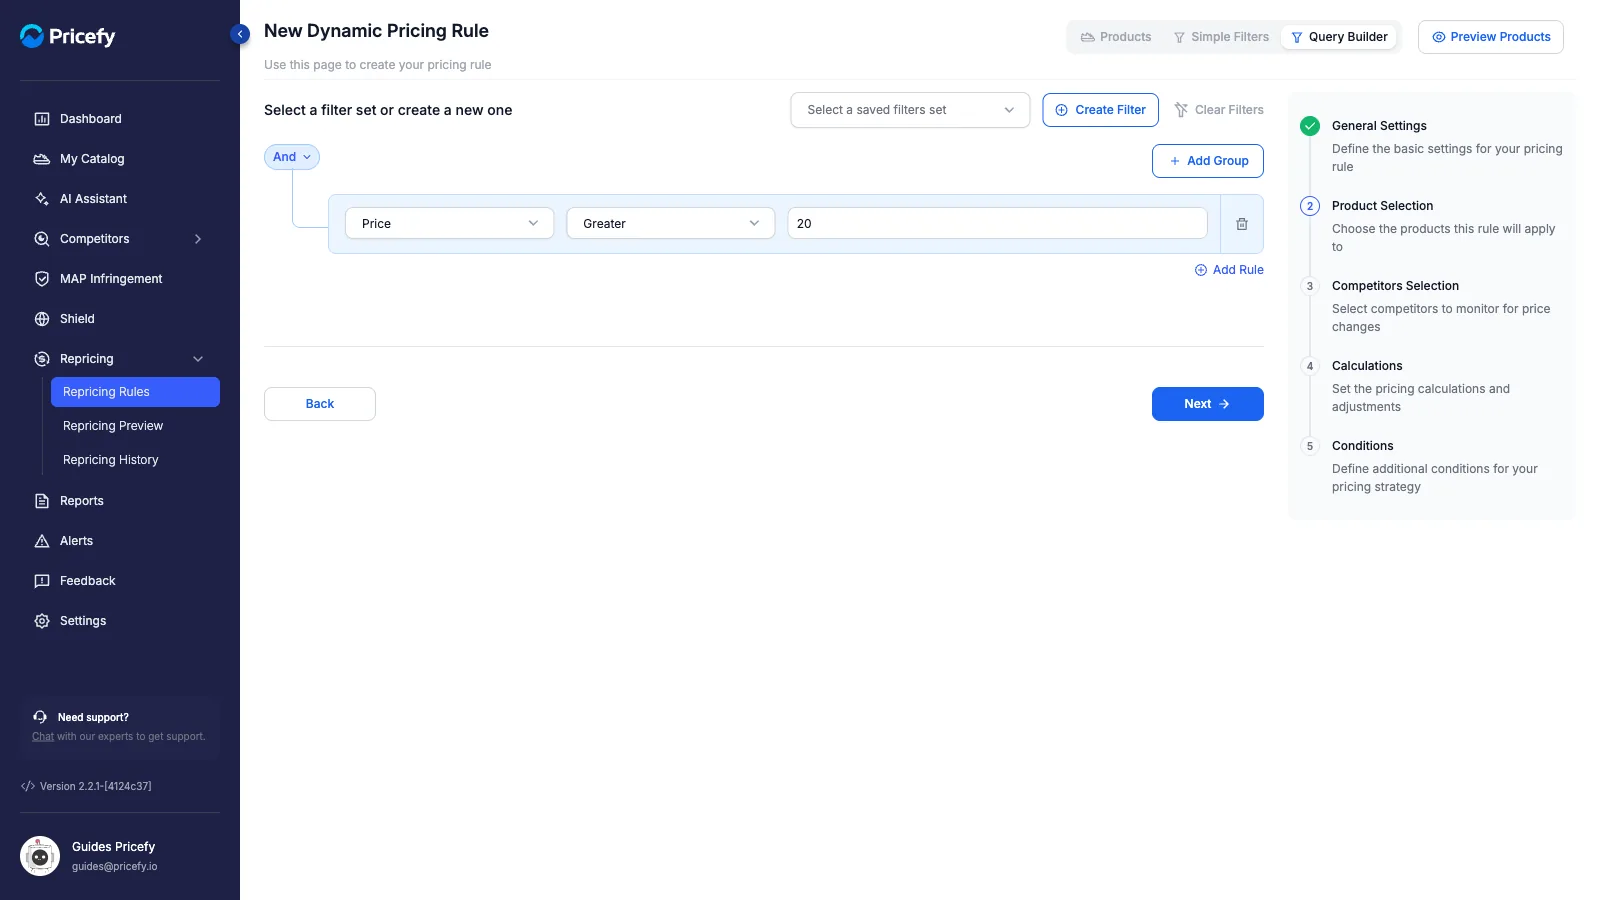
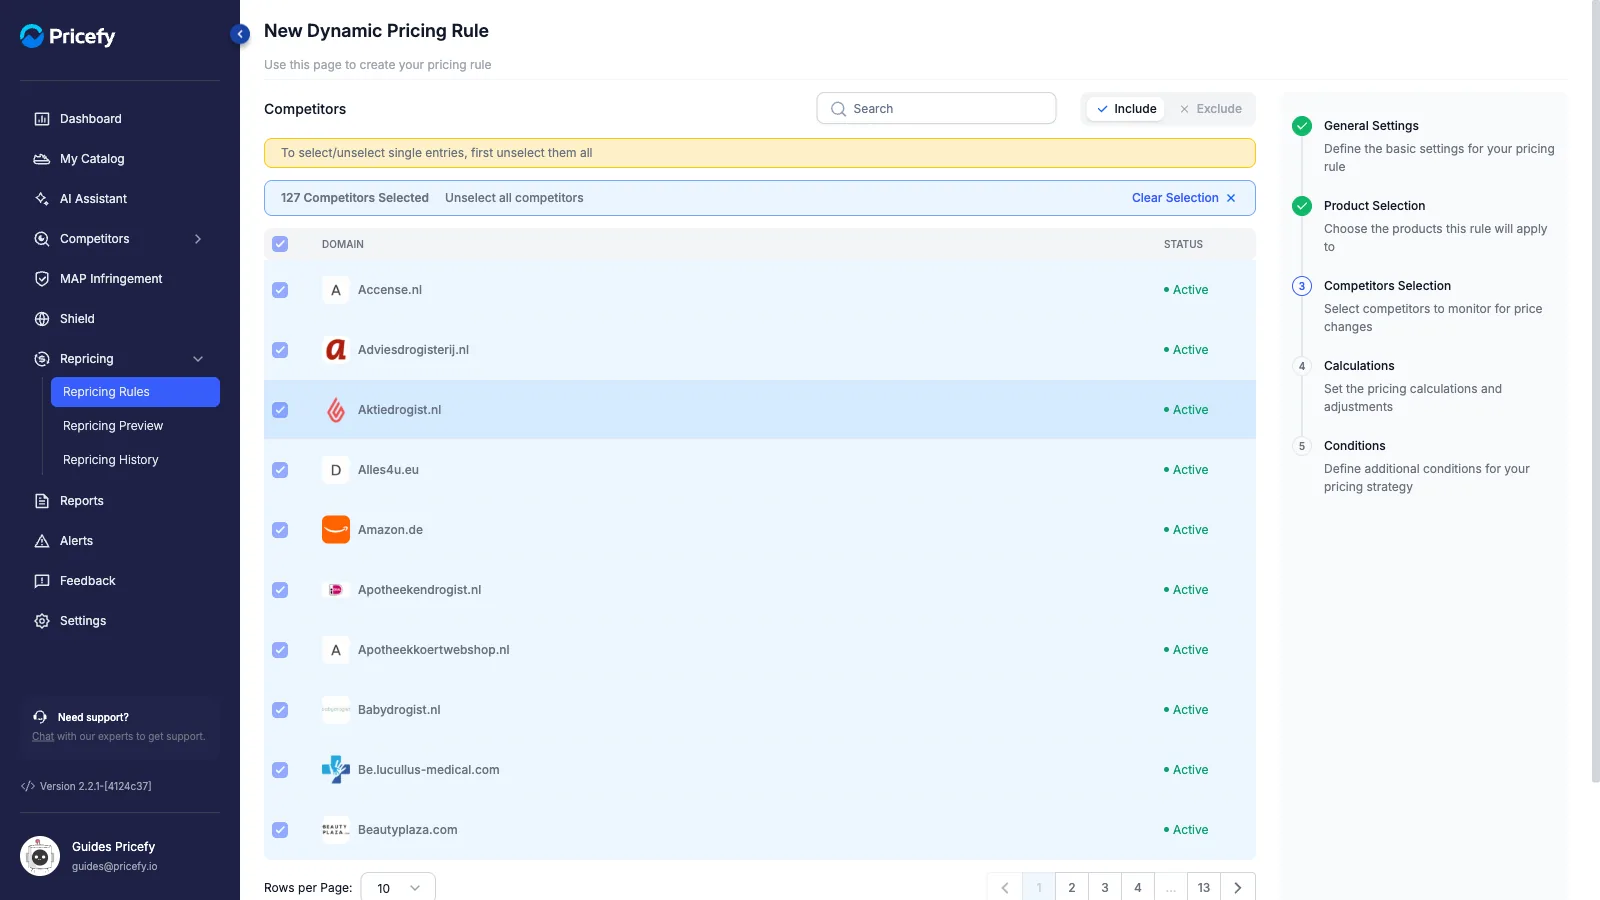
Step 3 — Competitors Selection
Pick which competitors the rule compares against. Tick them individually, or use the select-all checkbox to include every competitor — with the same Include / Exclude switch.
Step 4 — Calculations
Set New Price — an amount (in $ or %), set Below, Above or Equal to your Cheapest or Highest competitor. A line beneath shows a worked example.
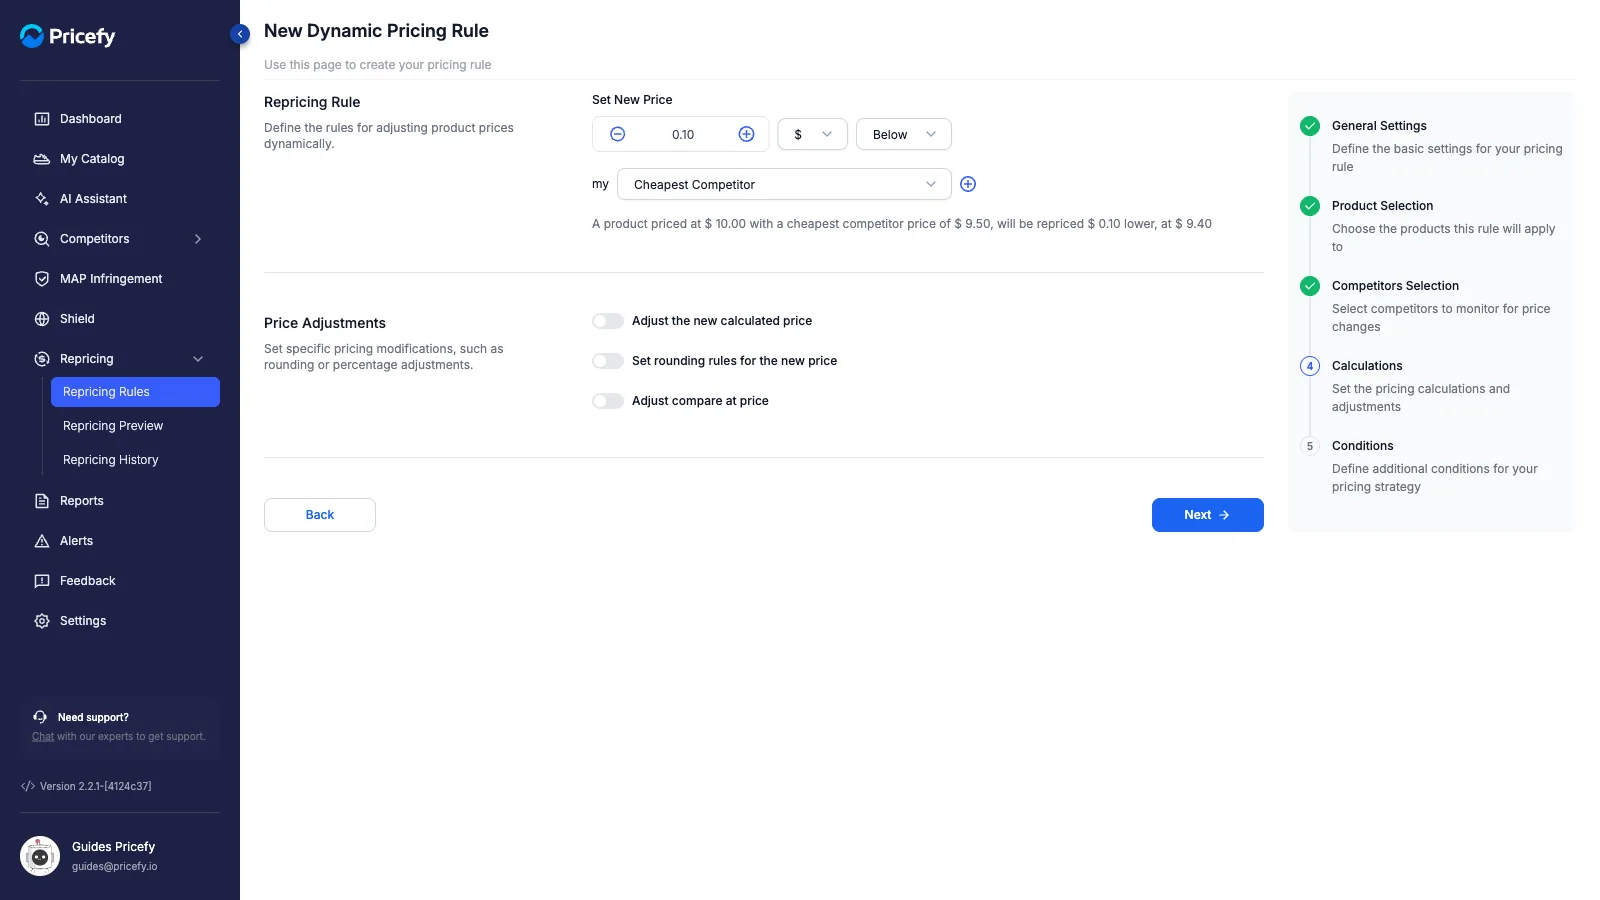
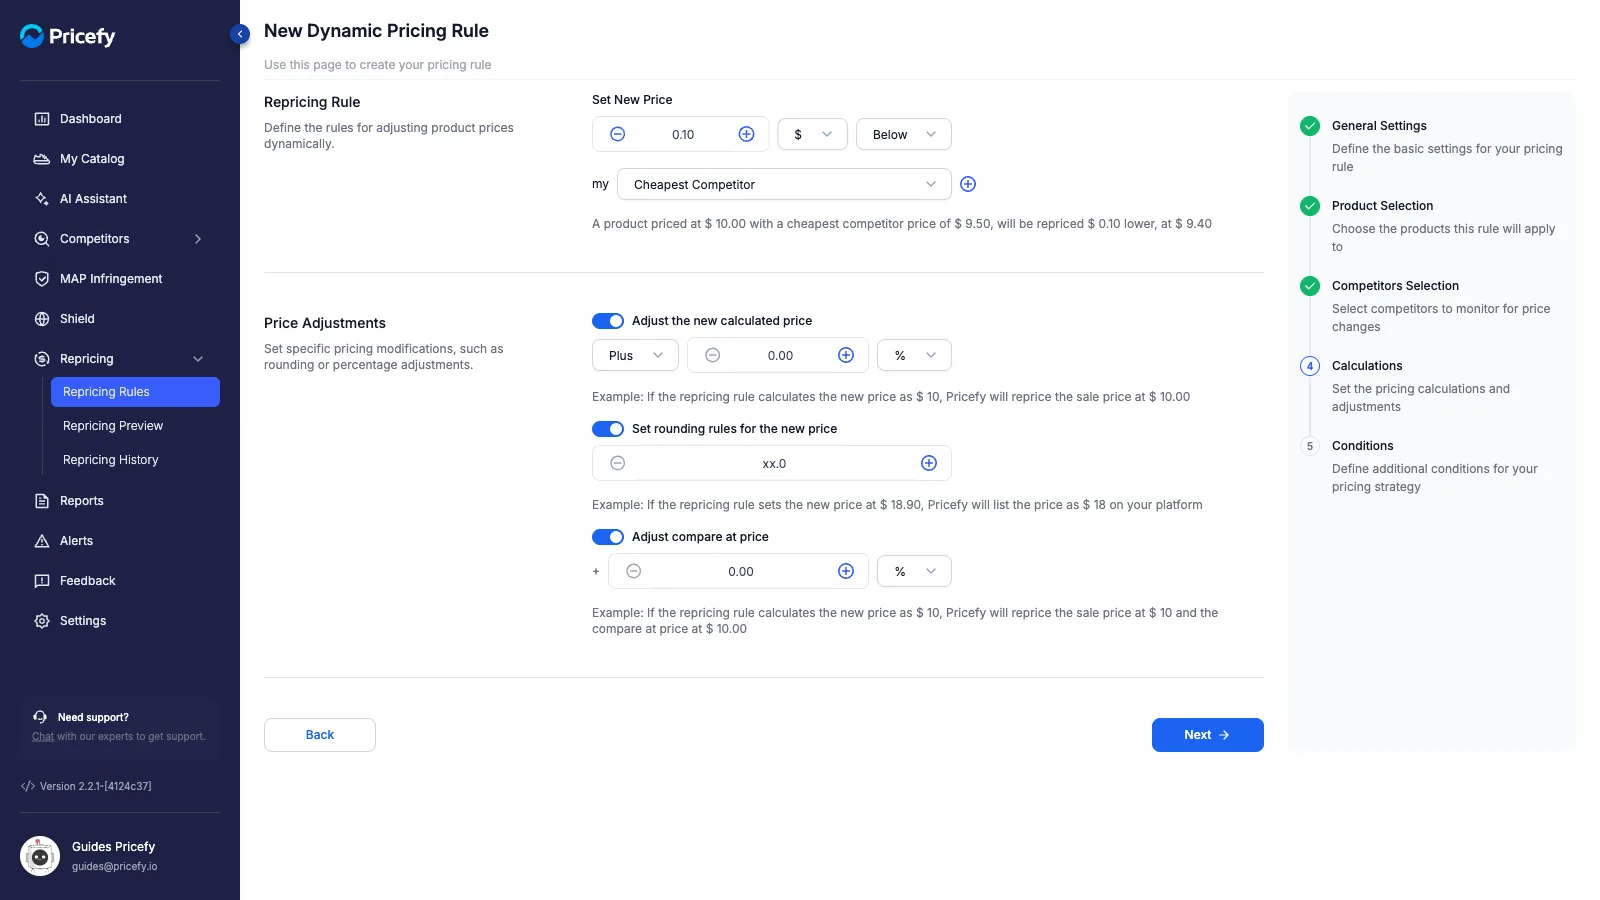
Price Adjustments — three optional refinements, each folded until you switch it on:
- Adjust the new calculated price — add a further Plus / Minus / Multiplied / Divided amount (fixed or %) to the computed price.
- Set rounding rules — pin the price’s ending (e.g. xx.99), so a calculated $18.90 lists with the ending you choose.
- Adjust compare-at price — set the struck-through compare-at price from the new price (± a fixed or % amount).
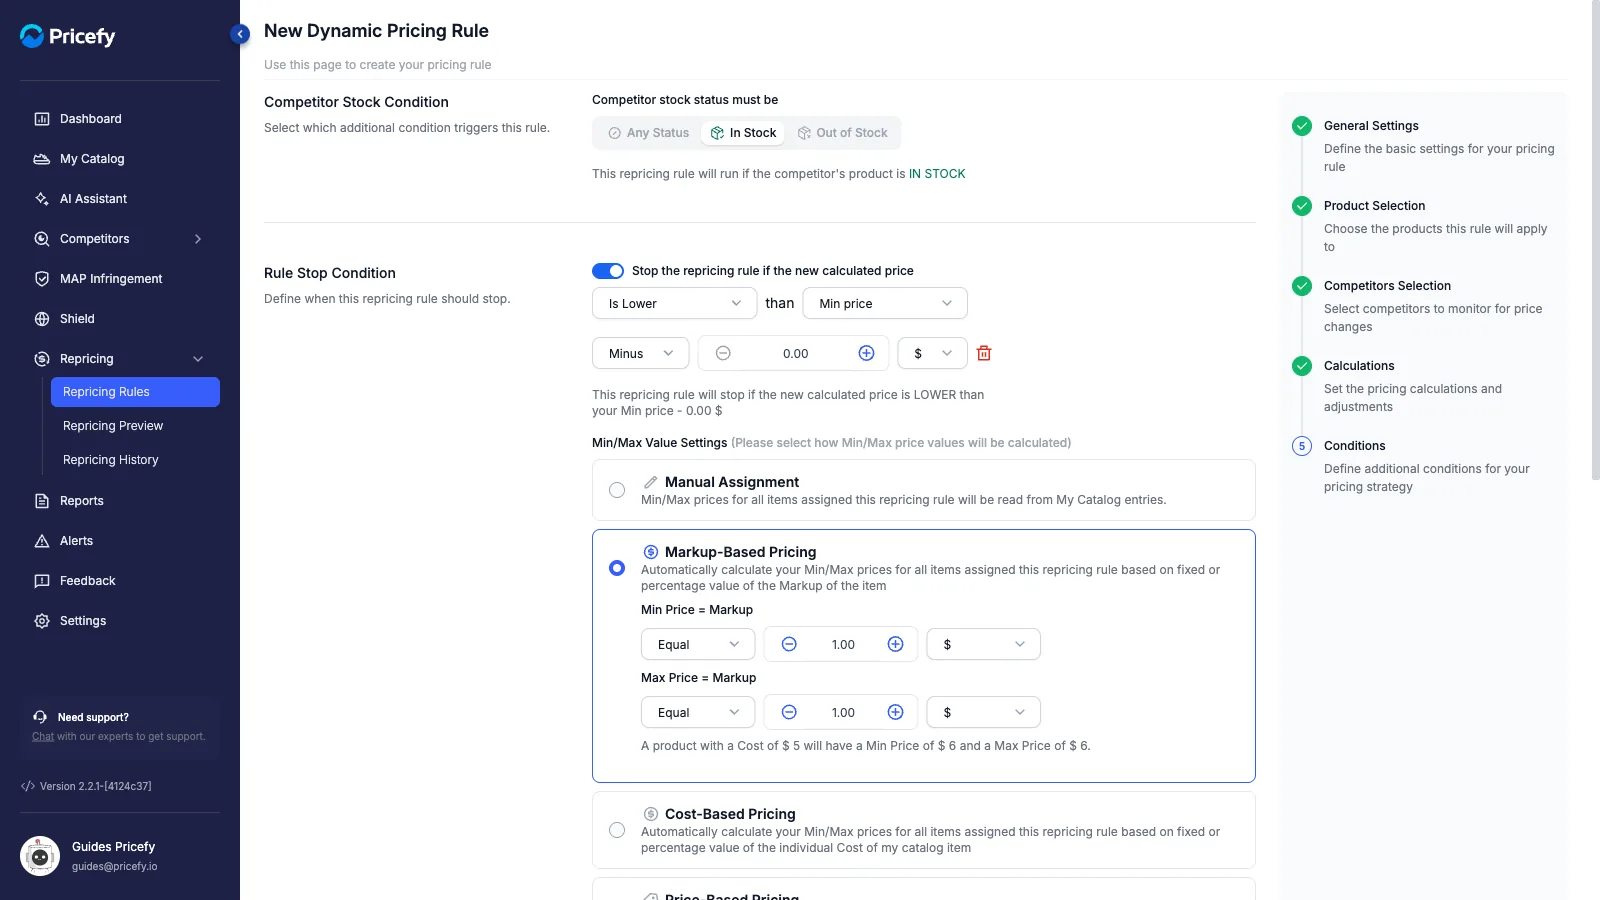
Step 5 — Conditions
Optional conditions that control when the rule runs, when it stops, and how edge cases are handled. Most are folded or off by default — open them to reveal their options.
Competitor stock condition
Run the rule only when the competitor is In Stock, Out of Stock, or for Any Status (the default). The line beneath confirms the choice.

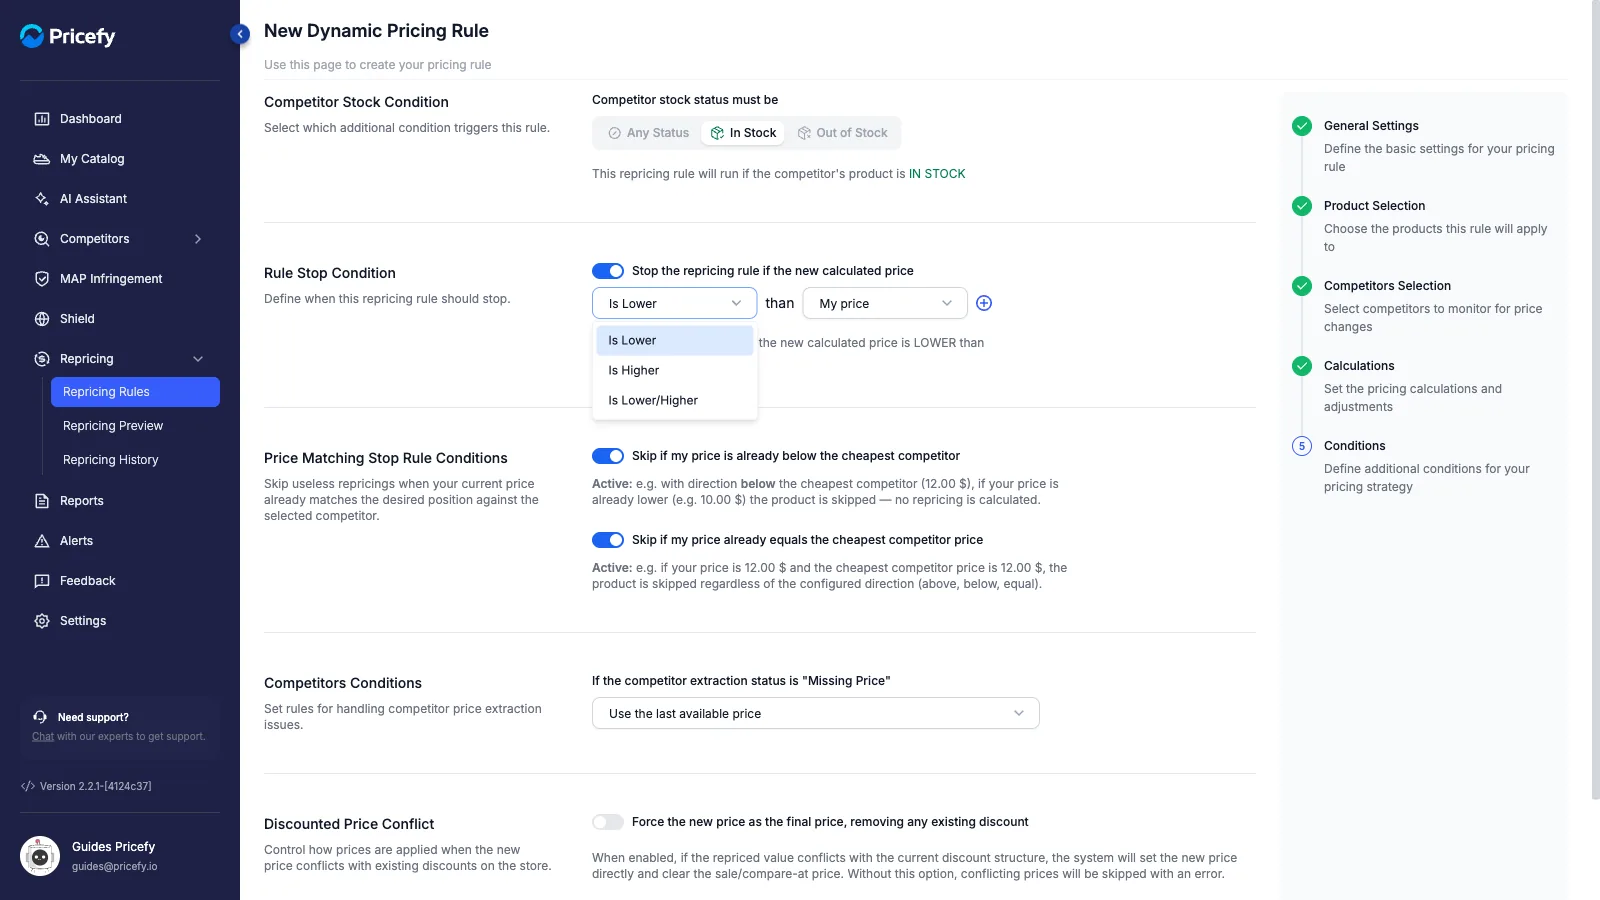
Rule Stop Condition
Off by default. Switch it on to stop the rule when the new calculated price crosses a limit, which you build in three parts.
First the comparison — stop when the price Is Lower, Is Higher, or Is Lower/Higher than a reference:
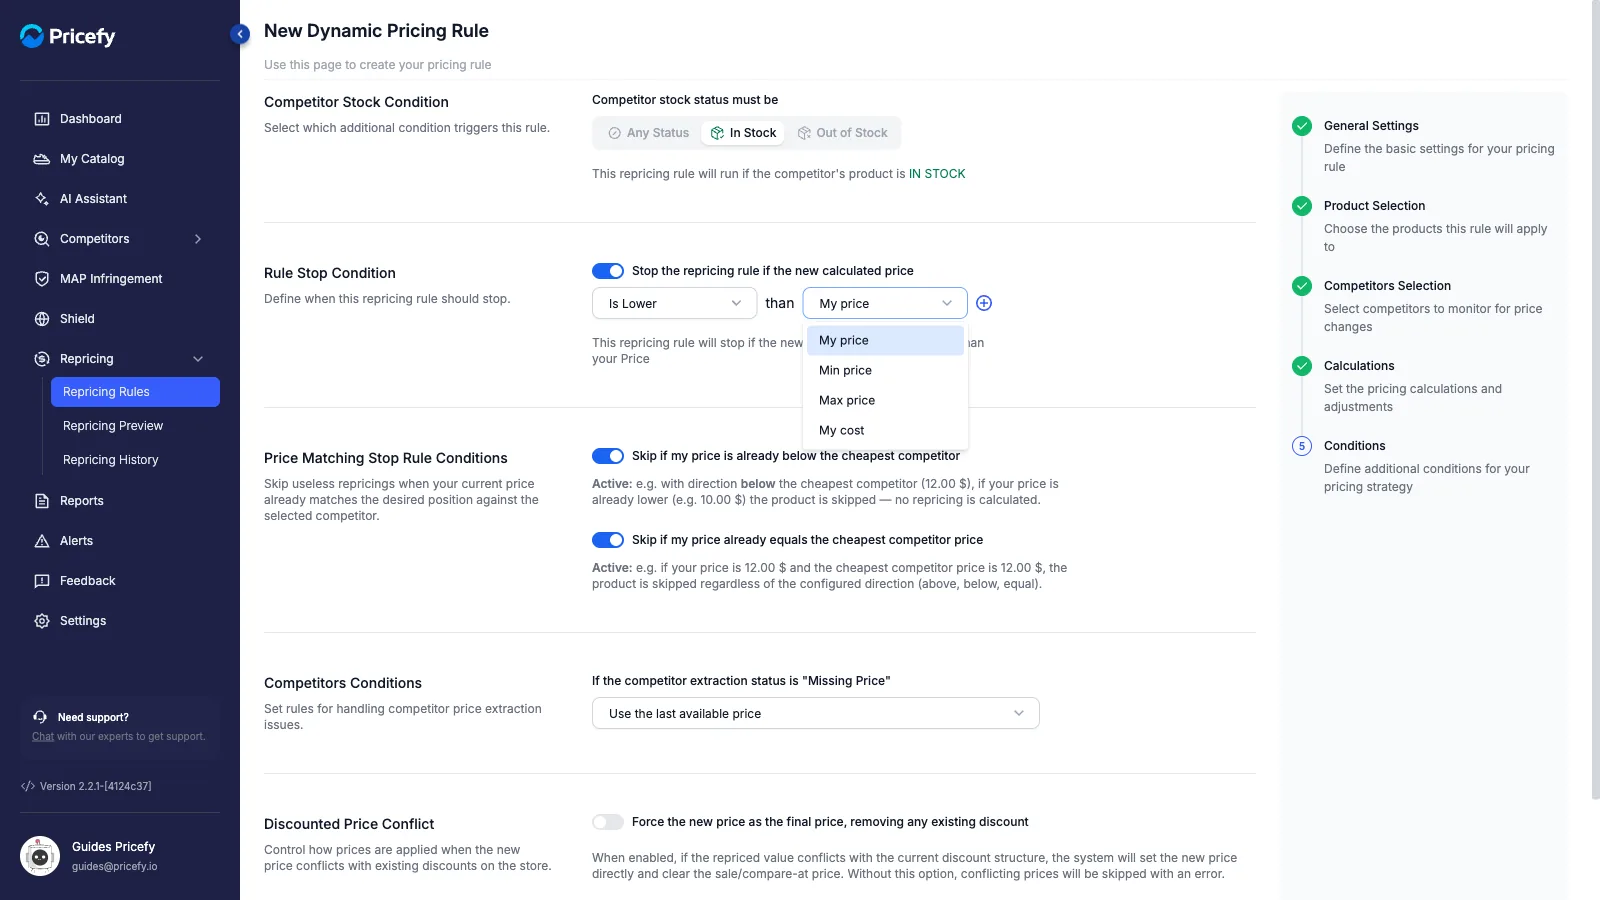
Then the reference price it is measured against — My price, Min price, Max price, or My cost:
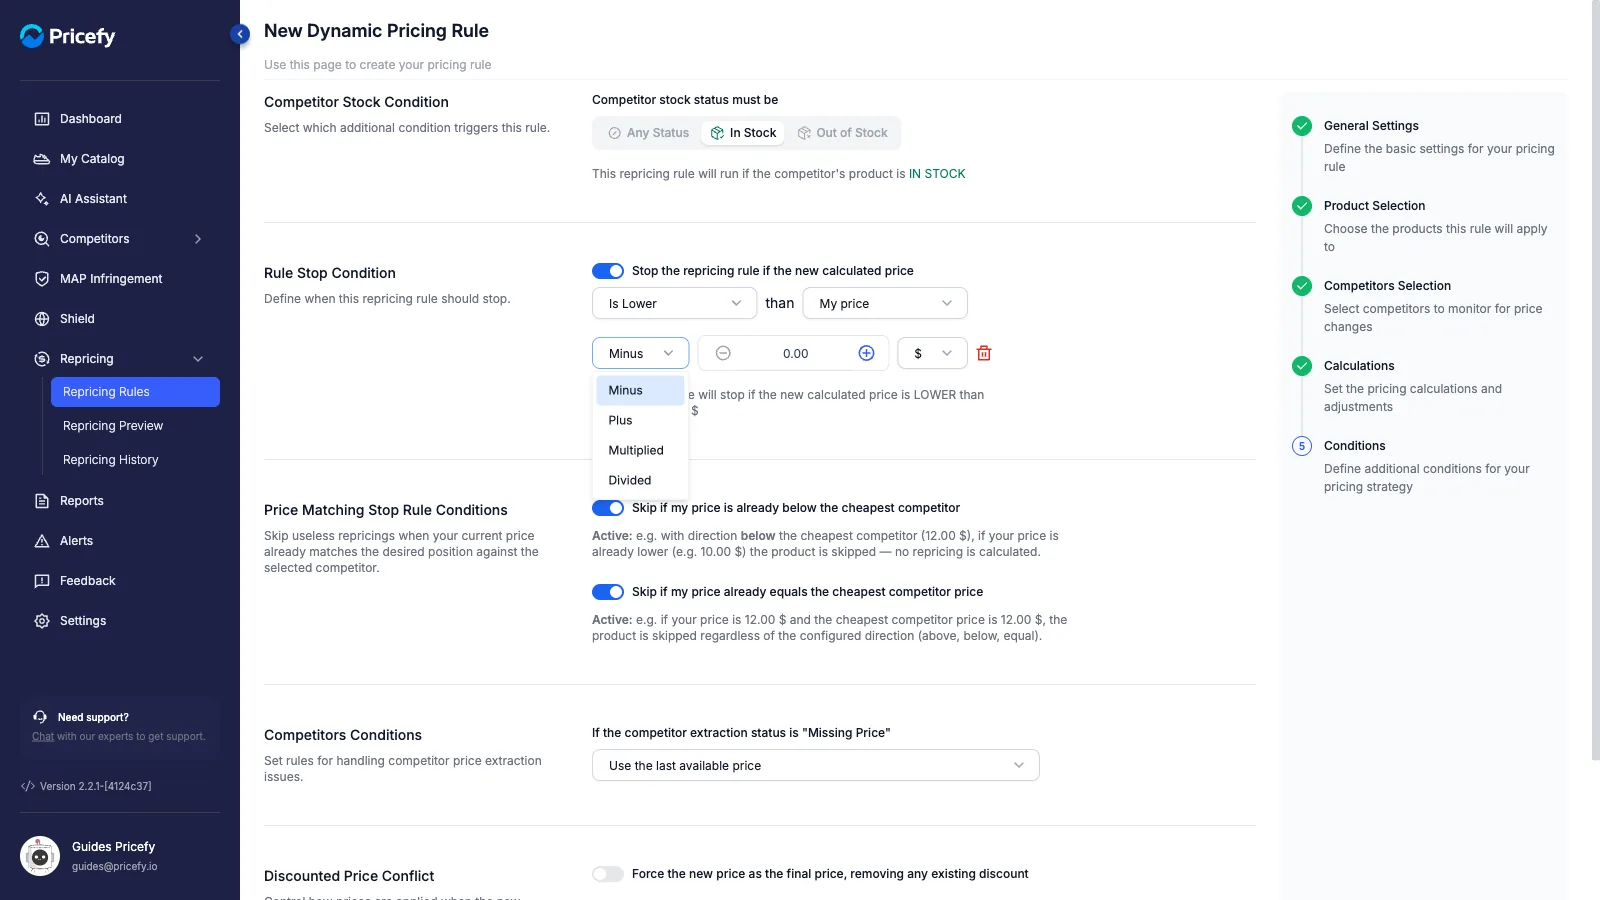
Finally, the + adds an optional adjustment to that reference — Minus / Plus / Multiplied / Divided by a fixed ($) or % amount. A line in plain English restates the whole rule as you build it:
Min/Max value settings
When the limit uses a Min or Max price, choose how those values are calculated:
- Manual — from each product’s Min/Max in My Catalog.
- Markup-based — from a fixed or % value of the item’s Markup.
- Cost-based — from the item’s Cost.
- Price-based — from the item’s Price.
- MAP-based — from the item’s MAP.
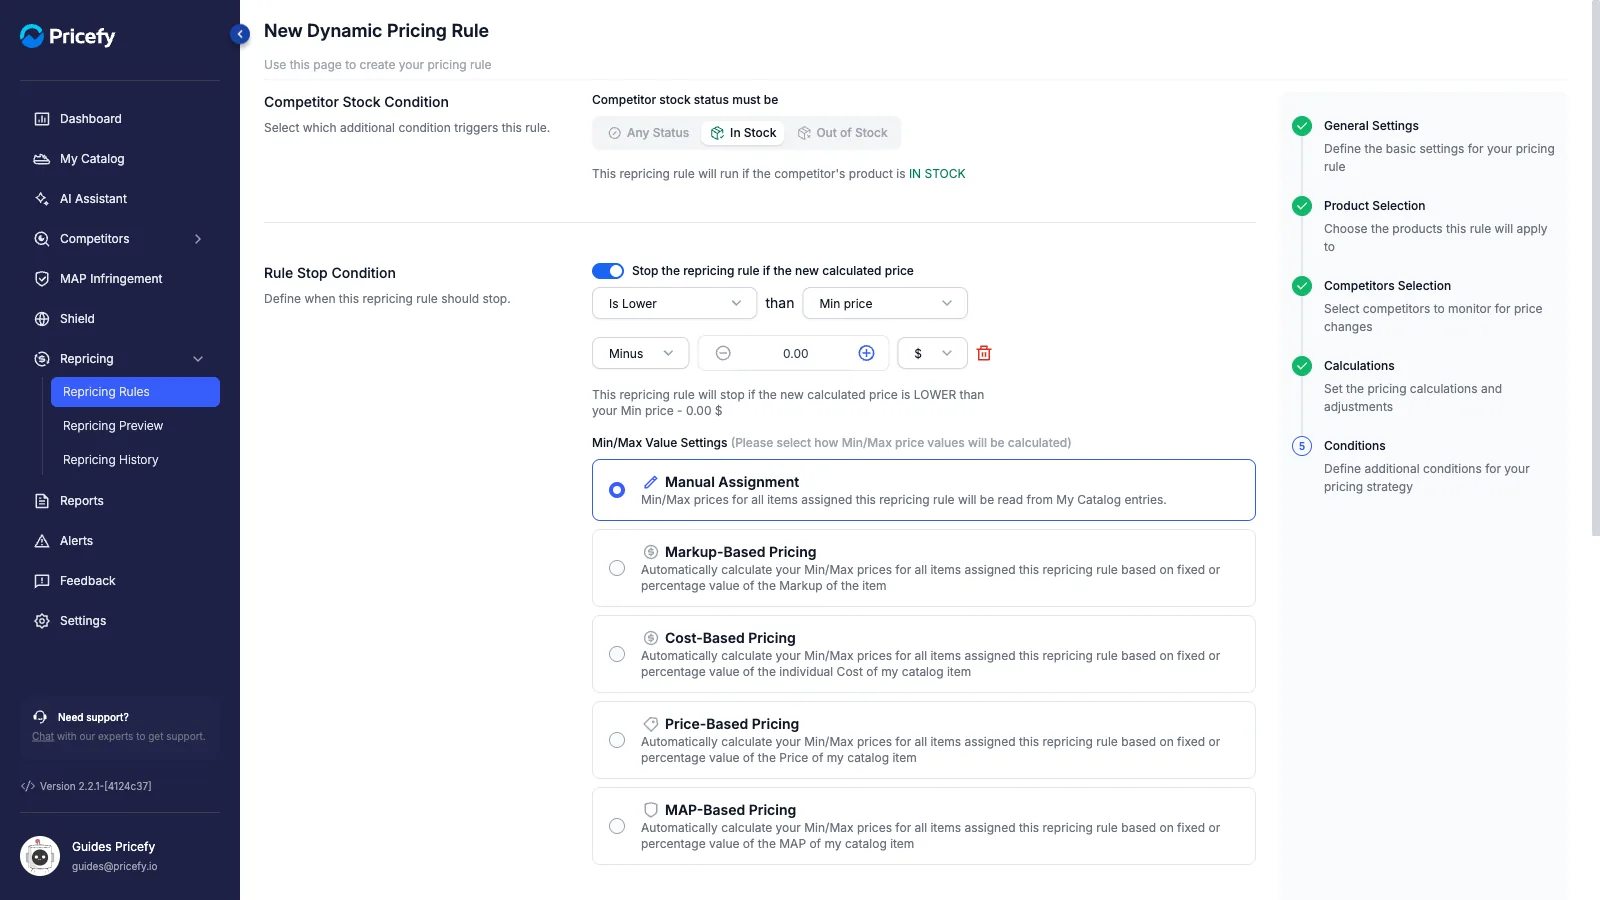
Every option except Manual unfolds its own Min Price = … and Max Price = … fields, with a live example.
Price-matching skips
Two switches that skip pointless repricings:
- Skip if my price is already (below / above / matches)… — skips a product already in the target position against the competitor.
- Skip if my price already equals… — skips when your price already equals the competitor’s.
Each shows an Active / Inactive explanation as you toggle it.
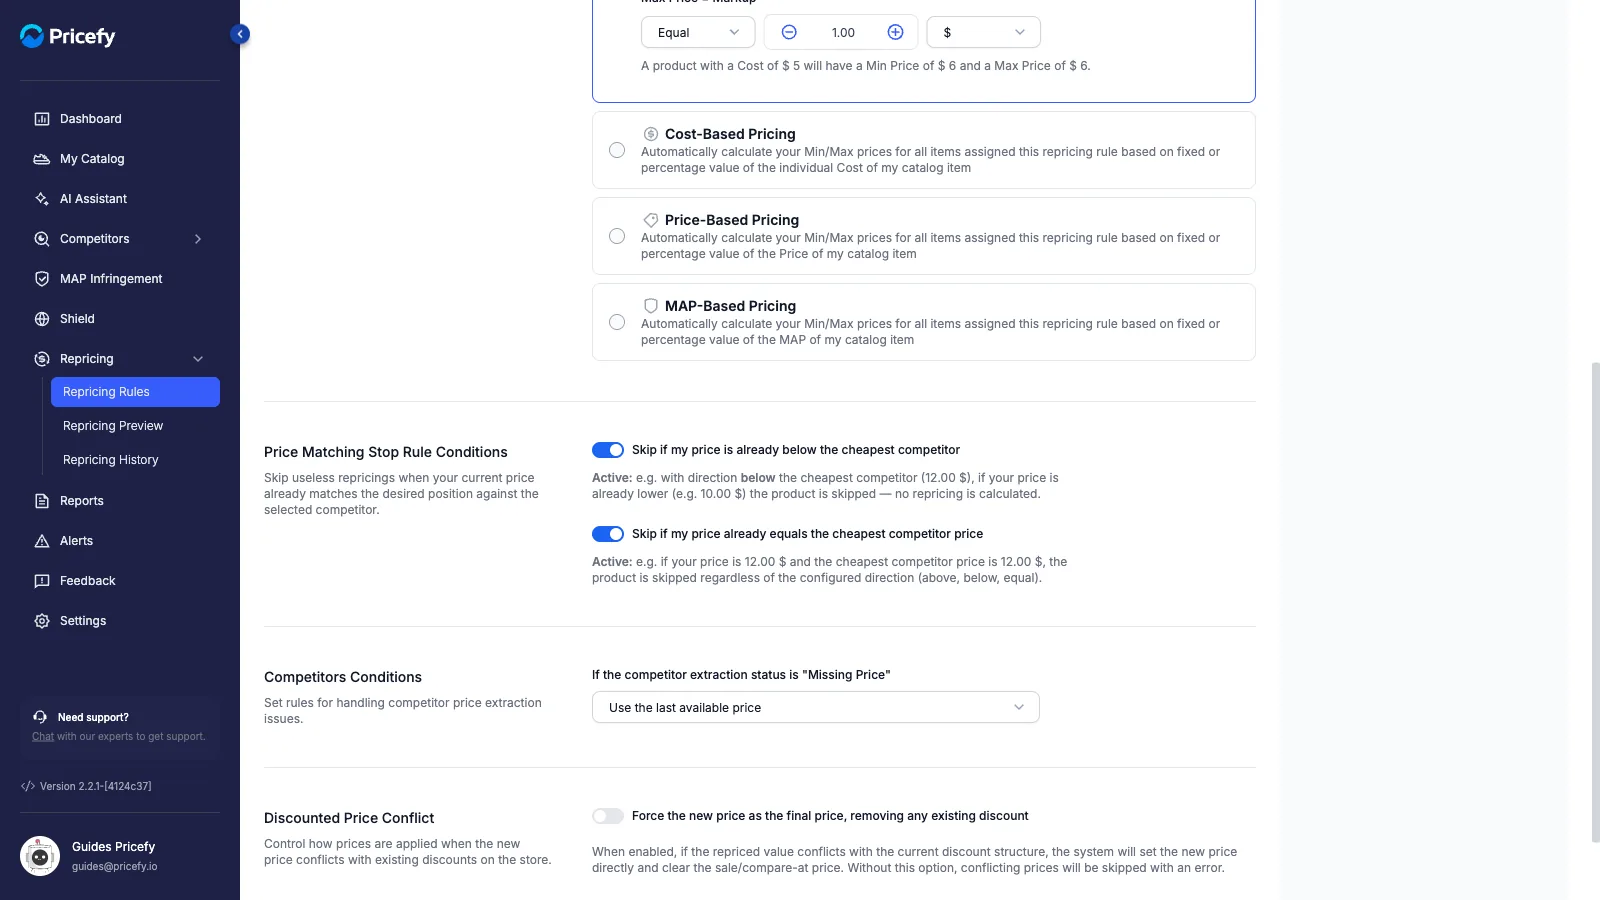
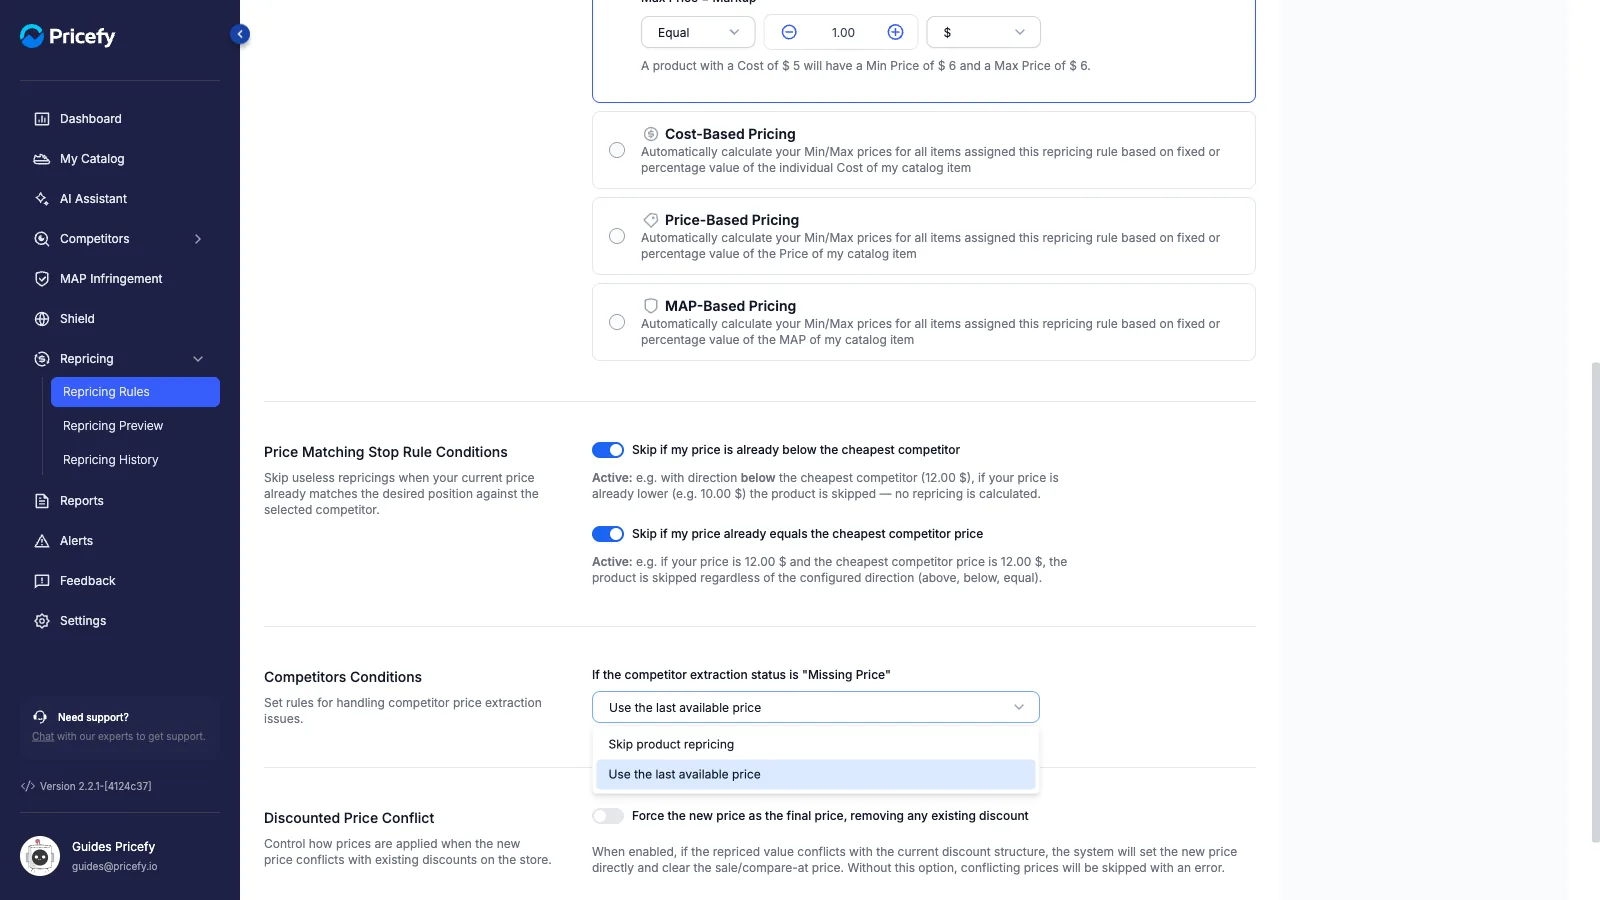
Missing competitor price
If a competitor’s price can’t be read, choose one:
- Skip product repricing.
- Use the last available price.
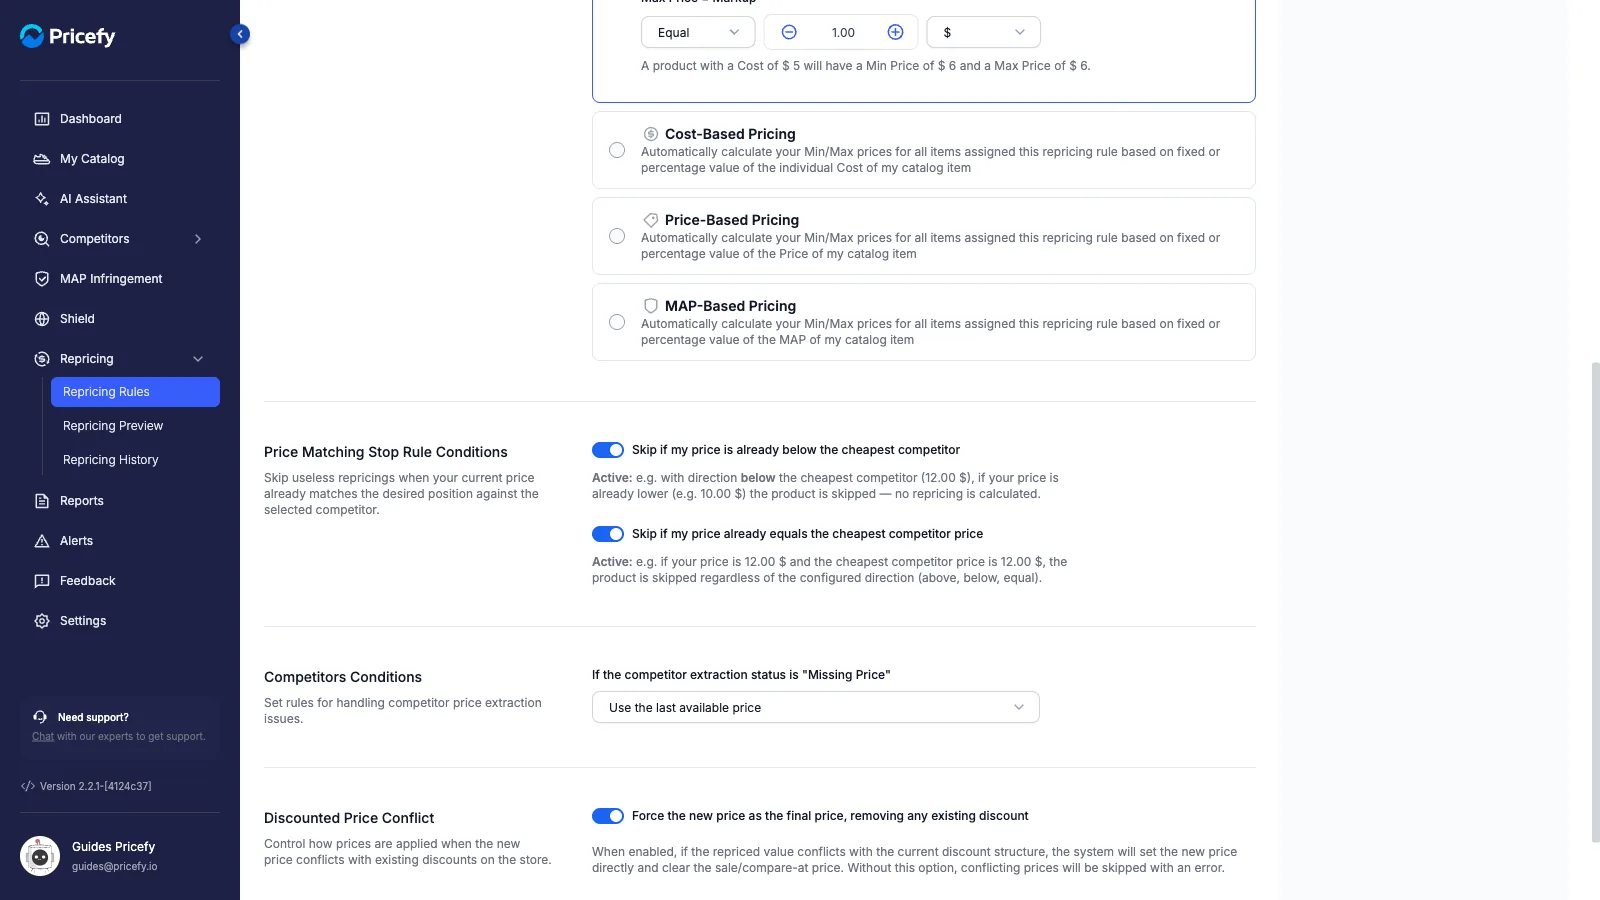
Discounted price conflict
One switch for products whose new price clashes with an existing discount:
- On — force the new price as final and clear the existing discount.
- Off — skip that product with an error.
Click Save, or Save & Preview on the last step to jump straight to the preview.