Tags are labels you attach to products to group and organize your catalog in Pricefy. Instead of tagging products one at a time, you can import tags in bulk from a CSV: Pricefy matches each row to a product by its SKU and applies your tags in one go.
You do this from My Catalog, using the Import Additional Info tool. The same tool can also import MAP, minimum/maximum price and cost, which is why the menu and window are labelled “Additional Info” rather than “tags”.
Where to import tags
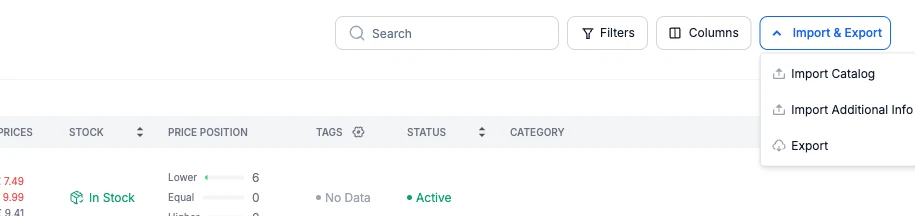
Go to My Catalog and click Import & Export in the top-right corner, then choose Import Additional Info.
Prepare your CSV file
To import tags, your file needs only two columns:
- sku — the SKU of a product that’s already in your catalog. This is how Pricefy finds the product to tag, so it’s required.
- tags — the tags for that product, separated by commas inside a single cell. Wrap the value in quotes (for example
"summer, sale") so the commas aren’t read as extra columns.
A simple tags file looks like this:
sku,tags
GN-581,"summer, sale, bestseller"
GN-580,"clearance"
GN-670,"new-arrival, featured"
You can add more columns to the same file — map, min_price, max_price and cost. Only the columns you include are updated; anything you leave out stays exactly as it is. Click Download CSV Template in the import window if you’d like to start from a ready-made file.
Upload and import
The Import Additional Info window lists exactly which columns it considers. Drop your CSV onto the upload area (or click Browse File), then click Import.
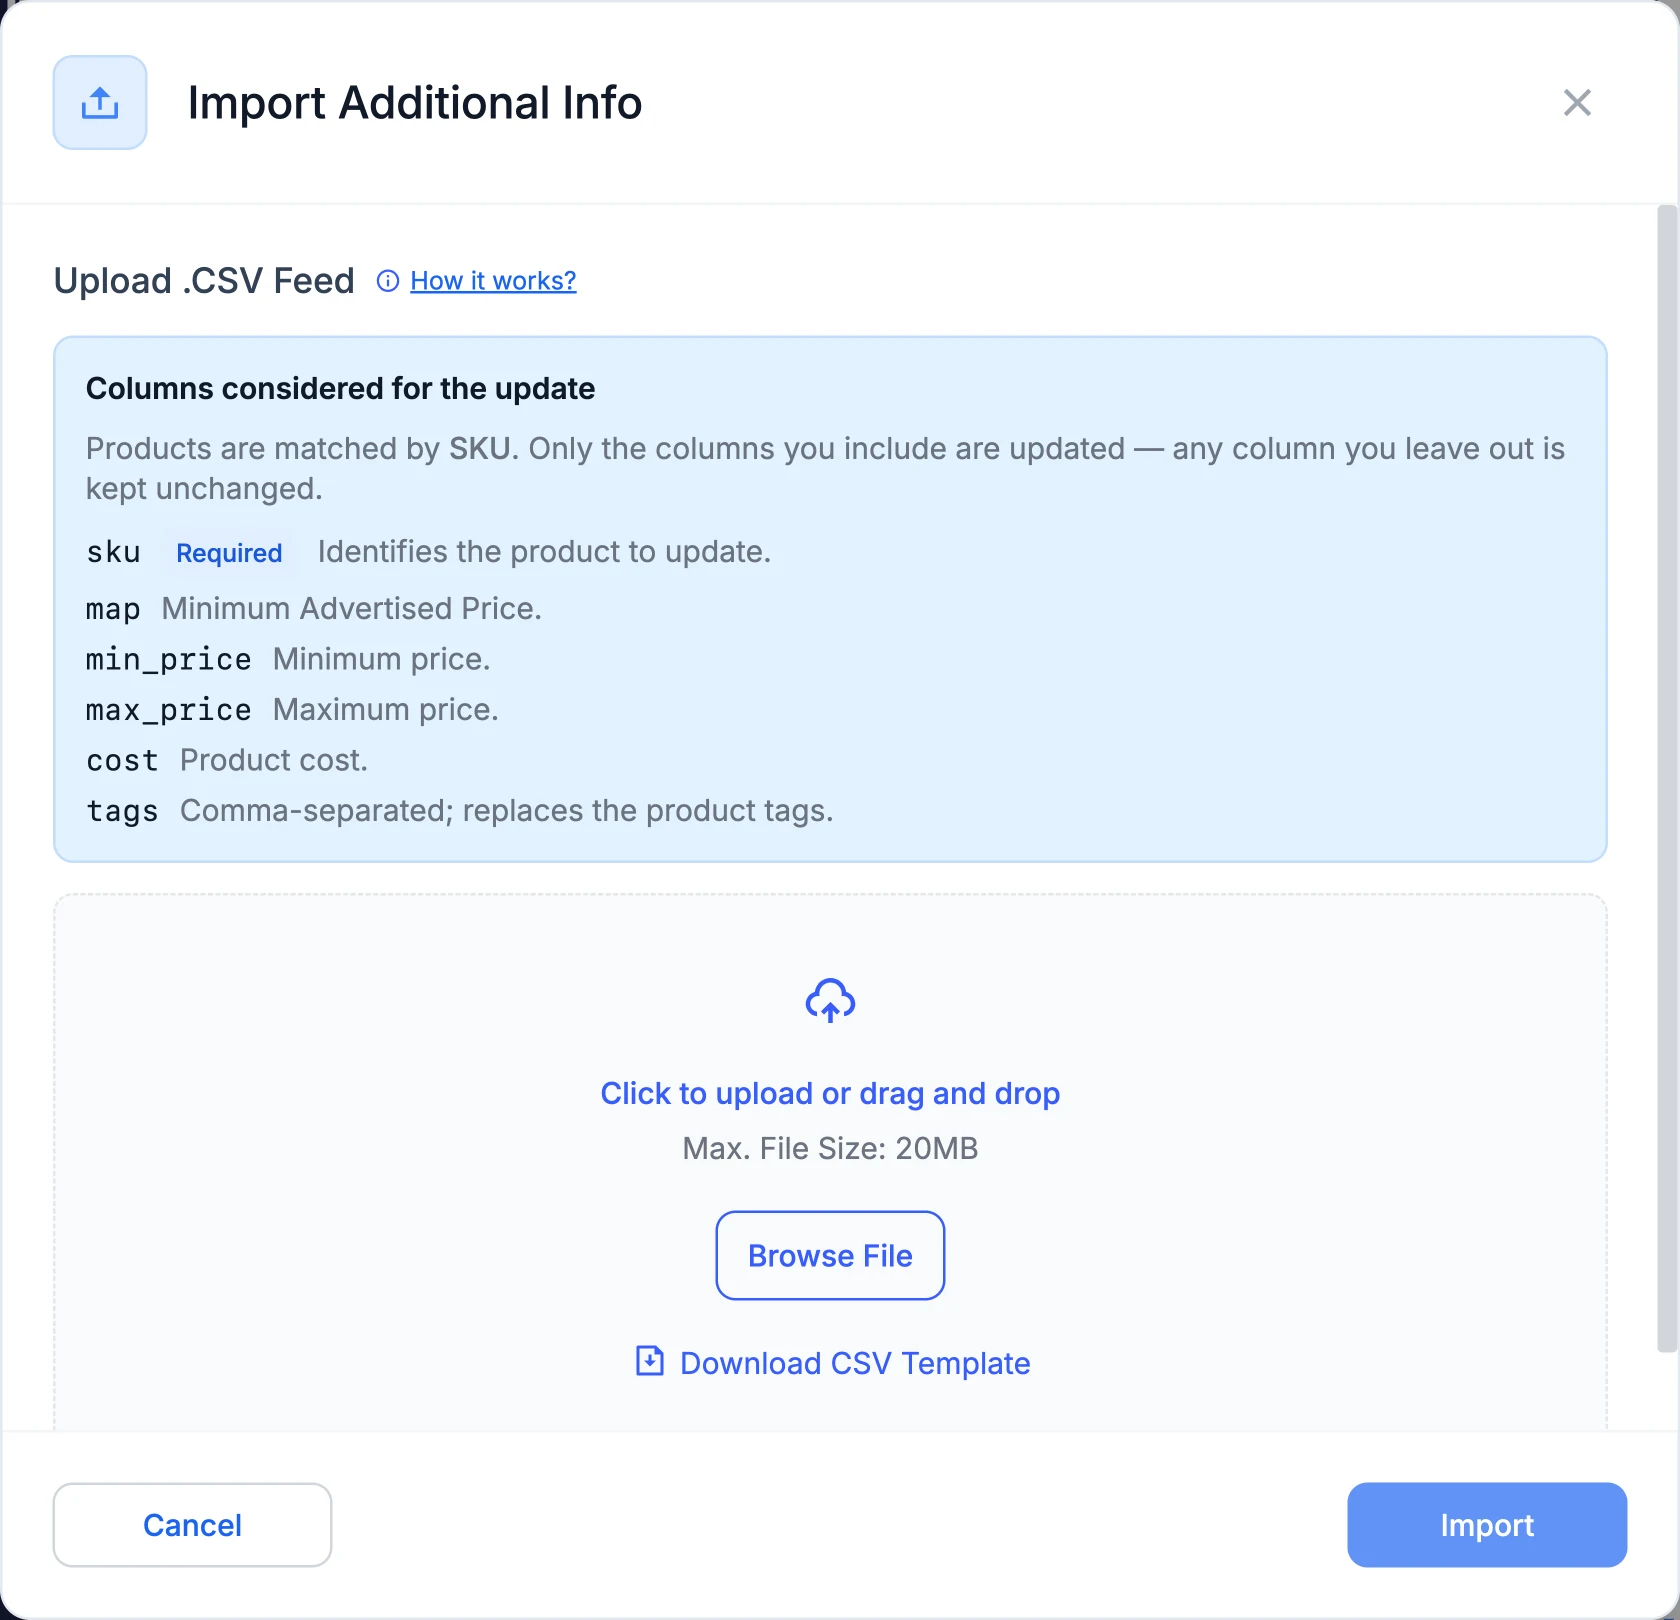
- The file must be a .CSV, up to 20 MB.
- The header has to include a sku column — without it the import is rejected.
The import runs in the background, so you can keep working — Pricefy notifies you once it’s finished.
How your tags are applied
A few rules decide what happens to each product’s tags:
- Matched by SKU — only products already in your catalog are updated. Rows whose SKU isn’t found are skipped, and no new products are created.
- Tags are replaced, not added — the tags in your file become that product’s tags. To keep an existing tag, include it in the cell alongside the new ones.
- An empty cell keeps the current tags — if a row’s tags cell is blank, that product’s tags are left unchanged. So a file that only updates cost or price won’t wipe your tags.
- Cleaned up automatically — extra spaces are trimmed, and empty or duplicate tags are removed.
- Up to 50 tags per product — if a product lists more, only the first 50 are kept.
See and use your tags
Once the import finishes, each product’s tags appear in the Tags column of My Catalog. If you don’t see that column, add it from the Columns menu. You can also click a product’s tags to view or edit them by hand.
Good to know: importing tags here is not the same as choosing which products to import from your store. To bring in only certain products from your connected store by their store tags, see How to import only selected products.